Crie um NPC que segue o jogador no Unity
Personagens não-jogadores ou NPCs são os personagens que não são controlados por um jogador humano e, em vez disso, são controlados pelos scripts ou pelo AI.
A tarefa mais comum que os NPCs devem realizar é seguir ou perseguir o Jogador.
Neste tutorial estarei mostrando como fazer um NPC que segue o jogador em Unity.
Etapa 1: crie o controlador do player
Criaremos um Player Controller simples, para que possamos passear e testar o NPC:
- Crie um novo GameObject ('GameObject' -> 'Create Empty') e nomeie-o "Player"
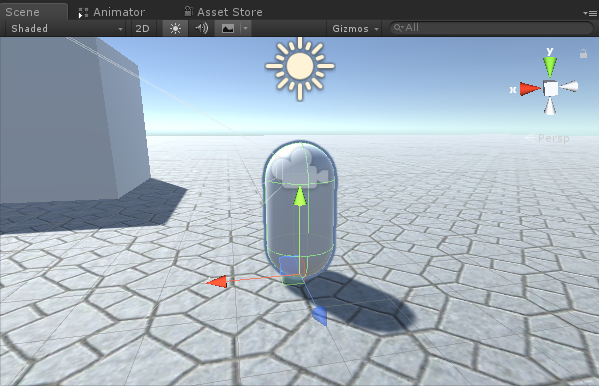
- Crie uma nova Cápsula ('GameObject' -> '3D Object' -> 'Capsule'), mova-a dentro do Player Object e mude sua posição para (0, 1, 0)
- Remover o componente Capsule Collider de uma cápsula
- Mova a câmera principal dentro do objeto do jogador e mude sua posição para (0, 1,64, 0)
- Crie um novo script, nomeie-o 'SC_CharacterController' e cole o código abaixo dentro dele:
'SC_CharacterController.cs'
using UnityEngine;

[RequireComponent(typeof(CharacterController))]

public class SC_CharacterController : MonoBehaviour
{
    public float speed = 7.5f;
    public float jumpSpeed = 8.0f;
    public float gravity = 20.0f;
    public Camera playerCamera;
    public float lookSpeed = 2.0f;
    public float lookXLimit = 45.0f;

    CharacterController characterController;
    Vector3 moveDirection = Vector3.zero;
    Vector2 rotation = Vector2.zero;

    [HideInInspector]
    public bool canMove = true;

    void Start()
    {
        characterController = GetComponent<CharacterController>();
        rotation.y = transform.eulerAngles.y;
    }

    void Update()
    {
        if (characterController.isGrounded)
        {
            // We are grounded, so recalculate move direction based on axes
            Vector3 forward = transform.TransformDirection(Vector3.forward);
            Vector3 right = transform.TransformDirection(Vector3.right);
            float curSpeedX = speed * Input.GetAxis("Vertical");
            float curSpeedY = speed * Input.GetAxis("Horizontal");
            moveDirection = (forward * curSpeedX) + (right * curSpeedY);

            if (Input.GetButton("Jump"))
            {
                moveDirection.y = jumpSpeed;
            }
        }

        // Apply gravity. Gravity is multiplied by deltaTime twice (once here, and once below
        // when the moveDirection is multiplied by deltaTime). This is because gravity should be applied
        // as an acceleration (ms^-2)
        moveDirection.y -= gravity * Time.deltaTime;

        // Move the controller
        characterController.Move(moveDirection * Time.deltaTime);

        // Player and Camera rotation
        if (canMove)
        {
            rotation.y += Input.GetAxis("Mouse X") * lookSpeed;
            rotation.x += -Input.GetAxis("Mouse Y") * lookSpeed;
            rotation.x = Mathf.Clamp(rotation.x, -lookXLimit, lookXLimit);
            playerCamera.transform.localRotation = Quaternion.Euler(rotation.x, 0, 0);
            transform.eulerAngles = new Vector2(0, rotation.y);
        }
    }
}- Anexe o script 'SC_CharacterController' ao Objeto Player e atribua uma Câmera Principal filha a uma variável Câmera do Player
- Você notará que ele adicionou automaticamente outro componente chamado Character Controller, mudando sua posição central para (0, 1, 0)
Passo 2: Crie o NPC
Para criar um NPC, siga os passos abaixo:
- Crie um novo GameObject e nomeie-o como "NPC"
- Crie uma nova Cápsula, mova-a para dentro do Objeto NPC e mude sua posição para (0, 1, 0)
- Crie um novo material e nomeie-o "npc_material"
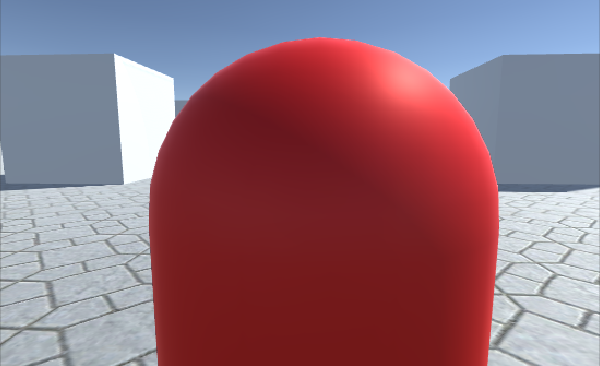
- Mude a cor do npc_material para vermelho
- Atribua npc_material à Cápsula dentro do Objeto NPC (isso é apenas para que possamos distinguir o NPC do Jogador)
Antes de continuar, precisamos preparar o NavMesh em nossa cena.
NavMesh significa "Navigation Mesh" e é usado em pathfinding para permitir que NPCs naveguem pelo nível sem esbarrar em obstáculos.
Para preparar o NavMesh, siga as etapas abaixo:
- Marque cada objeto estático na cena como navegação estática

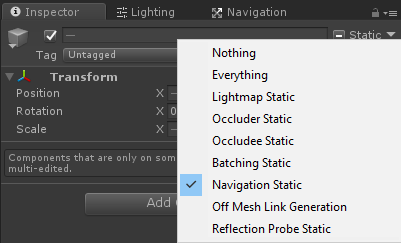
- Vá para a janela de navegação ('Janela' -> 'AI' -> 'Navigation'), selecione a guia Bake e clique em Bake
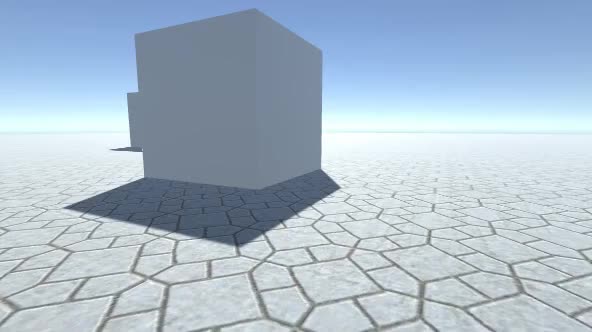
Depois que o NavMesh estiver pronto, ele deverá ficar parecido com isto:

Agora podemos passar para a programação do movimento NPC:
- Anexe o componente 'NavMesh Agent' ao objeto NPC
- Crie um novo script e nomeie-o 'SC_NPCFollow'
- Anexe o script 'SC_NPCFollow' ao objeto NPC
- Abra o script 'SC_NPCFollow'
Primeiro, começamos adicionando um namespace UnityEngine.AI no início do script:
using UnityEngine.AI;Então definimos as variáveis necessárias:
    //Transform that NPC has to follow
    public Transform transformToFollow;
    //NavMesh Agent variable
    NavMeshAgent agent;
No 'void Start()' começamos obtendo o componente NavMesh Agent anexado a este objeto:
    // Start is called before the first frame update
    void Start()
    {
        agent = GetComponent<NavMeshAgent>();
    }
Por fim, no 'void Update()' instruímos o Agente NavMesh a seguir o Player:
    // Update is called once per frame
    void Update()
    {
        //Follow the player
        agent.destination = transformToFollow.position;
    }
Aqui está o script 'SC_NPCFollow.cs' final:
using UnityEngine;
using UnityEngine.AI;

public class SC_NPCFollow : MonoBehaviour
{
    //Transform that NPC has to follow
    public Transform transformToFollow;
    //NavMesh Agent variable
    NavMeshAgent agent;

    // Start is called before the first frame update
    void Start()
    {
        agent = GetComponent<NavMeshAgent>();
    }

    // Update is called once per frame
    void Update()
    {
        //Follow the player
        agent.destination = transformToFollow.position;
    }
}
Corrigindo alguns problemas:
Problema 1: Após pressionar Play, a cápsula do NPC paira acima do solo:

Solução: Altere a variável Base Offset no NavMesh Agent para um valor negativo (no meu caso é -0,08)


Problema 2: O NPC chega muito perto ao seguir o Jogador:
Solução: Altere a distância de parada no NavMesh Agent para um valor maior (no meu caso eu configurei para 5)


O NPC já está pronto, vamos testá-lo:
Tudo funciona como esperado, o NPC agora segue o Jogador e para a uma distância definida.