Tutorial do controlador Worm 3D para Unity
Neste tutorial, mostrarei como criar um controlador worm simples em Unity, inspirado no tutorial de desenvolvimento de jogo para iniciantes TornadoTwins Series.
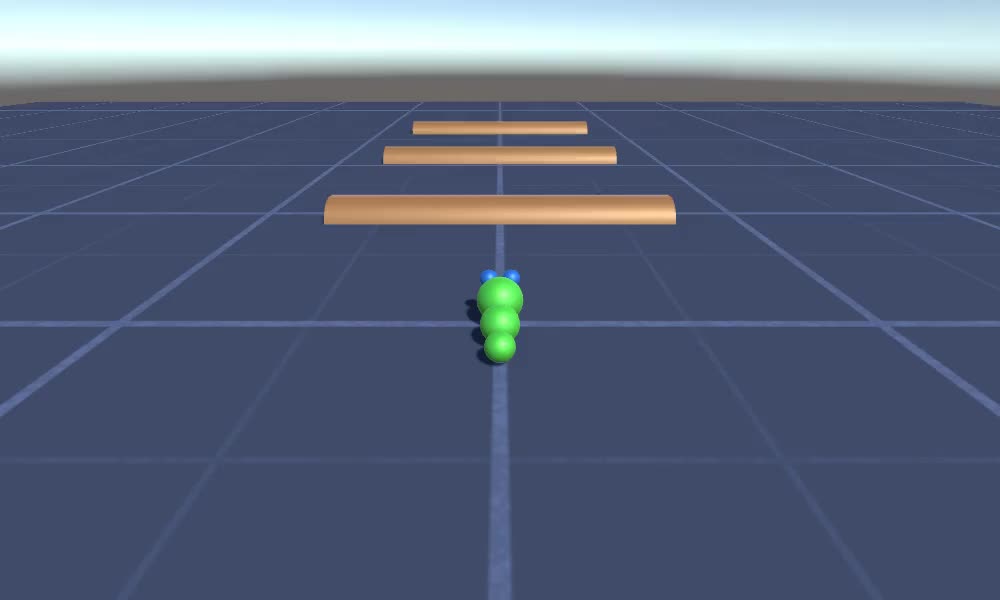
O controlador de verme deslizará com um efeito suave de cauda e terá a capacidade de pular.
Os scripts neste tutorial foram originalmente escritos em JavaScript (também conhecido como UnityScript), que não é mais compatível, portanto, fornecerei uma alternativa em C#.
Para criar um controlador de worm em Unity precisaremos:
- Crie os scripts necessários
- Crie um personagem verme
- Atribuir os scripts ao personagem
Etapa 1: crie todos os scripts necessários
Vamos começar criando todos os scripts que serão necessários para configurar um controlador de worm:
- Crie um novo script, chame-o de "SC_WormController" e cole o código abaixo dentro dele:
SC_WormController.cs
using System.Collections;
using System.Collections.Generic;
using UnityEngine;
[RequireComponent(typeof(CharacterController))]
public class SC_WormController : MonoBehaviour
{
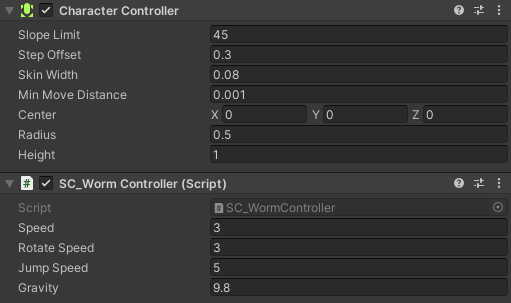
public float speed = 3.0f;
public float rotateSpeed = 1.0f;
public float jumpSpeed = 5.0f;
public float gravity = 9.8f;
CharacterController controller;
Vector3 moveDirection;
// Start is called before the first frame update
void Start()
{
controller = GetComponent<CharacterController>();
}
// Update is called once per frame
void Update()
{
// Rotate around y - axis
transform.Rotate(0, Input.GetAxis("Horizontal") * rotateSpeed, 0);
// Move forward / backward
Vector3 forward = transform.TransformDirection(Vector3.forward);
float curSpeed = speed * Input.GetAxis("Vertical");
float movementDirectionY = moveDirection.y;
moveDirection = forward * curSpeed;
// Jumping
if (Input.GetButtonDown("Jump") && controller.isGrounded)
{
moveDirection.y = jumpSpeed;
}
else
{
moveDirection.y = movementDirectionY;
}
// Apply gravity. Gravity is multiplied by deltaTime twice (once here, and once below
// when the moveDirection is multiplied by deltaTime). This is because gravity should be applied
// as an acceleration (ms^-2)
if (!controller.isGrounded)
{
moveDirection.y -= gravity * Time.deltaTime;
}
// Move the controller
controller.Move(moveDirection * Time.deltaTime);
}
}- Crie um novo script, chame-o de "SC_CameraFollow" e cole o código abaixo dentro dele:
SC_CameraFollow.cs
using System.Collections;
using System.Collections.Generic;
using UnityEngine;

public class SC_CameraFollow : MonoBehaviour
{
    /*
    This camera smoothers out rotation around the y-axis and height.
    Horizontal Distance to the target is always fixed.

    There are many different ways to smooth the rotation but doing it this way gives you a lot of control over how the camera behaves.

    For every of those smoothed values we calculate the wanted value and the current value.
    Then we smooth it using the Lerp function.
    Then we apply the smoothed values to the transform's position.
    */

    // The target we are following
    public Transform target;
    // The distance in the x-z plane to the target
    public float distance = 10.0f;
    // the height we want the camera to be above the target
    public float height = 5.0f;
    // How much we
    public float heightDamping = 2.0f;
    public float rotationDamping = 3.0f;

    void LateUpdate()
    {
        // Early out if we don't have a target
        if (!target)
            return;

        // Calculate the current rotation angles
        float wantedRotationAngle = target.eulerAngles.y;
        float wantedHeight = target.position.y + height;
        float currentRotationAngle = transform.eulerAngles.y;
        float currentHeight = transform.position.y;

        // Damp the rotation around the y-axis
        currentRotationAngle = Mathf.LerpAngle(currentRotationAngle, wantedRotationAngle, rotationDamping * Time.deltaTime);

        // Damp the height
        currentHeight = Mathf.Lerp(currentHeight, wantedHeight, heightDamping * Time.deltaTime);

        // Convert the angle into a rotation
        Quaternion currentRotation = Quaternion.Euler(0, currentRotationAngle, 0);

        // Set the position of the camera on the x-z plane to:
        // distance meters behind the target
        transform.position = target.position;
        transform.position -= currentRotation * Vector3.forward * distance;

        // Set the height of the camera
        transform.position = new Vector3(transform.position.x, currentHeight, transform.position.z);

        // Always look at the target
        transform.LookAt(target);
    }
}- Crie um novo script, chame-o de "SC_SmoothFollow" e cole o código abaixo dentro dele:
SC_SmoothFollow.cs
using System.Collections;
using System.Collections.Generic;
using UnityEngine;

public class SC_SmoothFollow : MonoBehaviour
{
    // The target we are following
    public Transform target;
    // The distance in the x-z plane to the target
    public float distance = 10.0f;
    // the height we want the camera to be above the target
    public float height = 5.0f;
    // How much we
    public float heightDamping = 2.0f;
    public float rotationDamping = 3.0f;

    // Start is called before the first frame update
    void Start()
    {
        if (!target) return;

        transform.LookAt(target);
    }

    void LateUpdate()
    {
        // Early out if we don't have a target
        if (!target) return;

        // Calculate the current rotation angles
        float wantedRotationAngle = target.eulerAngles.y;
        float wantedHeight = target.position.y + height;

        float currentRotationAngle = transform.eulerAngles.y;
        float currentHeight = transform.position.y;

        // Damp the rotation around the y-axis
        currentRotationAngle = Mathf.LerpAngle(currentRotationAngle, wantedRotationAngle, rotationDamping * Time.deltaTime);

        // Damp the height
        currentHeight = Mathf.Lerp(currentHeight, wantedHeight, heightDamping * Time.deltaTime);

        // Convert the angle into a rotation
        var currentRotation = Quaternion.Euler(0, currentRotationAngle, 0);

        // Set the position of the camera on the x-z plane to:
        // distance meters behind the target
        transform.position = target.position;
        transform.position -= currentRotation * Vector3.forward * distance;

        // Set the height of the camera
        transform.position = new Vector3(transform.position.x, currentHeight, transform.position.z);

        // Always look at the target
        transform.LookAt(target);
    }
}
Passo 2: Crie um personagem Worm
O próximo passo é criar um personagem worm:
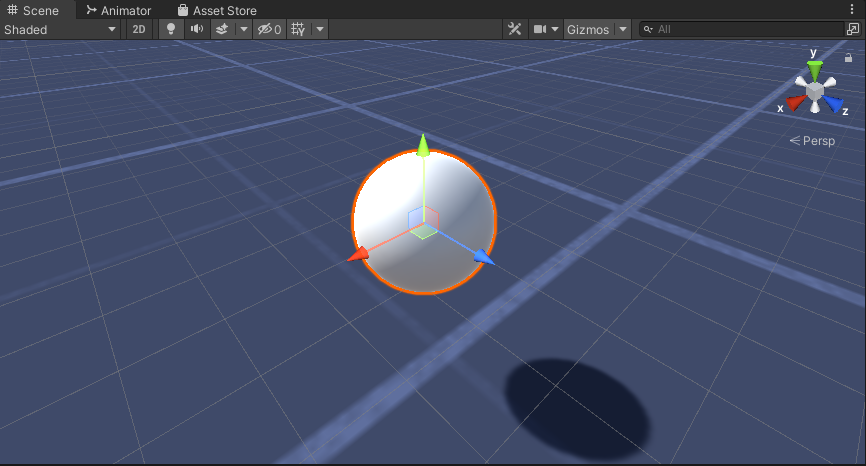
- Crie uma nova esfera (GameObject -> Objeto 3D -> Esfera), mude sua posição para (0, 0, 0), exclua seu componente SphereCollider e renomeie-o para "Worm"
- Duplique a esfera "Worm", renomeie-a para "BodyPart1", mude sua posição para (0, -0,1, -0,9) e mude sua escala para (0,8, 0,8, 0,8)
- Duplique a esfera "Worm" novamente, renomeie-a para "BodyPart2", mude sua posição para (0, -0,2, -1,6) e mude sua escala para (0,6, 0,6, 0,6)

- Clique com o botão direito no objeto "Worm" -> Criar Vazio e renomeie o objeto recém-criado para "Eyes"
- Duplique a esfera "BodyPart2", renomeie-a para "Eye" e mova-a dentro do objeto "Eyes", mude sua posição para (-0,24, 0,353, 0,324) e mude sua escala para (0,4, 0,4, 0,4)
- Duplique a esfera "Eye" e mude sua posição X para 0,24

- Para a visualização, você pode criar alguns materiais, por exemplo, verde para o corpo e azul para os olhos.

O personagem Worm está pronto.
Etapa 3: configurar o controlador Worm
A última etapa é atribuir os scripts:
- Anexe o script SC_CameraFollow ao objeto Main Camera e atribua a esfera "Worm" à variável de destino:

- Anexe o script SC_WormController à esfera "Worm" (isso adicionará automaticamente outro componente chamado CharacterController):
- Anexe o script SC_SmoothFollow à esfera "BodyPart1" e defina seus valores como na captura de tela abaixo:

- Anexe o script SC_SmoothFollow à esfera "BodyPart2" e defina seus valores como na captura de tela abaixo:

O controlador agora está pronto, use W, A, S e D para se mover e Espaço para pular.
O pacote fonte Unity está disponível abaixo.